By Data RecoveryUpdated on January 26, 2026
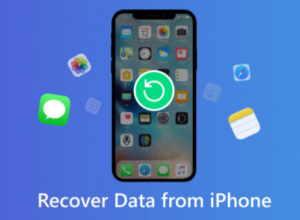
For iPhone users, accidental water damage is undoubtedly a “data crisis” — it may not only cause the device to fail to turn on, but also lead to the loss of important data such as contacts, photos, and work notes. But don’t panic — even without prior backup, most data can be successfully retrieved with the right handling methods and tools. This article will detail how to judge iPhone water damage, emergency handling guidelines, and 3 efficient data recovery solutions to help you minimize losses.
Quickly Judge If Your iPhone Is Damaged by Water
To stop further damage in time, you first need to confirm if the device is damaged by water. The following 4 simple methods can help you judge quickly:
Check the Liquid Contact Indicator (LCI):Remove the iPhone’s SIM card tray and observe the inside of the slot. If a red mark appears, it means the device has come into contact with liquid (water or other liquids) and is likely damaged by water.
Test Audio and Video Functions:Water is prone to eroding the speaker and microphone. If there is noise or unclear sound when playing audio, the microphone fails to record clearly, or there is obvious moisture on the speaker grille, it is a typical sign of water damage.
Pay Attention to System Error Messages:When liquid invades internal hardware, the phone will frequently pop up random error prompts or system warnings, and some apps may fail to start normally — this is a sign of internal component damage.
Check Device Operation Status:If your iPhone suddenly freezes, crashes frequently, or jumps to apps automatically, it is likely that moisture has affected the core components. Stop using it immediately and take action.
Emergency Handling for Water-Damaged iPhones: Dos and Don’ts
Correct emergency handling can prevent further data damage. Please keep the following points in mind:
Dos:
Take the iPhone out of the water immediately to avoid continuous moisture penetration;
Gently wipe the surface, ports, and gaps of the phone with a clean tissue or soft cloth to remove moisture;
Remove the SIM card and SIM card tray to reduce liquid residue;
Remove phone cases, headphones, and other external accessories to prevent moisture from being trapped in gaps;
Store it in a sealed container with silica gel desiccant to speed up moisture evaporation;
Send it to an Apple-authorized service provider for inspection as soon as possible — do not disassemble the phone yourself.
Don’ts:
Never attempt to turn on the phone or press any buttons (may cause short circuits);
Do not connect it to a computer or charger with a USB cable (current will aggravate hardware damage);
Never shake the phone (will spread moisture to more internal components);
Do not dry it with a hair dryer (high temperature will burn the screen and motherboard);
Never put the phone in uncooked rice or cat litter (rice grains/cat litter particles may enter ports and cause secondary damage).
Here’s how to scan and recover deleted files from iPhone without a backup:


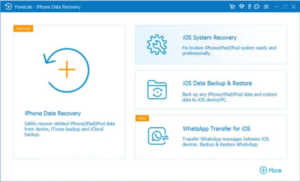
Step 1: Launch iPhone Data Recovery on Computer
Launch the iPhone data recovery on your computer, then select “iPhone Data Recovery” feature.
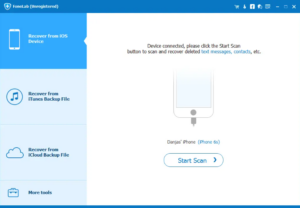
Step 2: Connect iPhone to Computer
To scan and recover data from iPhone devices directly, then select “Recover from iOS Device” and connect your iPhone to the computer via a USB cable.
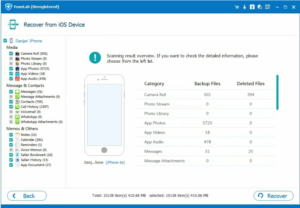
Step 3: Select Type of Data and Scan the iPhone
Then, please select type of data you need to recover, click “Start Scan” to scan your iPhone’s memory, the software start to find the deleted data from your iPhone device directly.
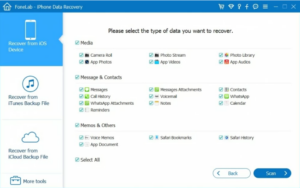
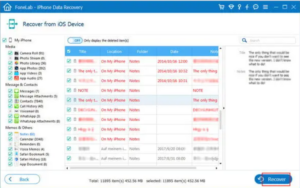
Step 4: Choose Deleted Data to Scan
After the software has fully scanned your iPhone’s internal storage, it will classify your files and data into the three categories: Message & Contacts, Media, Memos & Others. You can click on the specific subdirectories to view the recoverable files. Now, navigate to the list of items you want and select the data to recover.
Step 5: Recover iPhone Data
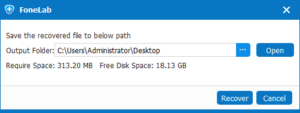
When you are done selecting, click the “Recover” button and customize the location where you want to store the recovered iPhone files in the pop-up dialog box, then hit “Recover” to start the recovery process.
Click the “Recover” button, then choose a location on the hard drive, and hit the “Recover” button again to save the lost/deleted data onto your computer. To recover contacts from iPhone, the contacts will then be saved as HTML or CSV file to your chosen path.
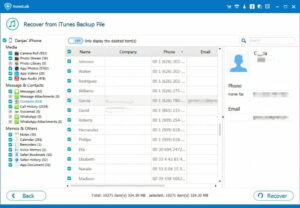
Here’s how to recover data from wiped iPhone by extracting from iTunes backup selectively.
Step 1: Select Recover from iTunes Backup
Run the program, and select “Recover from iTunes Backup” mode.
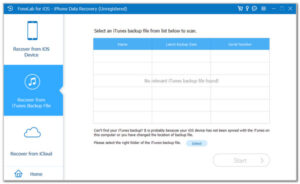
Step 2: Scan Data from iTunes Backup File
Then, choose an iTunes backup and click “Scan” button, the tool will automatically scan the iTunes backup made from the computer.
Step 3: Preview and Recover Data
After scanning completed, all the lost and deleted data included in the backup. You can preview them in detail, then click the “Recover” button start to recover and save data you want to computer.
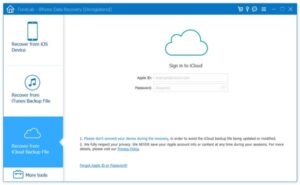
The mentioned this iPhone data recovery software supports all iOS versions and models, it can free to scan your iPhone devices and iTunes, then shows the preview of the deleted and existing data before you recover them. To avoid duplicate data from your iPhone or iPad, let’s teach you how to restore data from iCloud backup using iPhone Data Recovery.
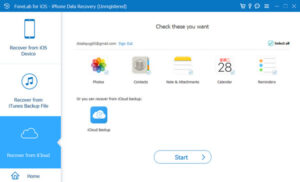
Step 1: Choose Recover from iCloud Backup File
Click “Recover from iCloud Backup File” in homepage and then log into your iCloud account (The same one as the former).
Step 2: Select iCloud Backup History to Scan
Choose the iCloud Backup button at the bottom left and choose the backups you want to recover. Follow the on-screen instructions afterward to complete the procedure.
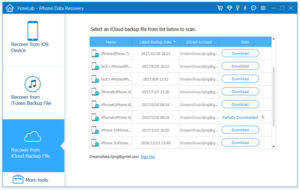
Step 3: Scan and Recover iCloud Data
After scanning completed, then you can preview your backups in iCloud backup. Next you can choose data that you want to recover and make it in the list. Confirm data that you want to recover and next you can click “Recover” to finish.
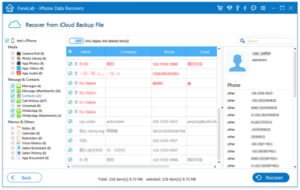
Recover iPhone Lost/Deleted Photos from iCloud Backups
Free download the iPhone data recovery and start to recover your iPhone lost or deleted data now!
Frequently Asked Questions (FAQs)
My iPhone is water-damaged and won’t turn on — can I still recover data?
Yes! First, dry the phone completely in a sealed container with silica gel desiccant (about 1-2 days), then scan the device directly with be iPhone data recovery. If it still cannot recognized, repair the device with an iOS system repair tool first, then try to recover data.
How to recover only photos from a water-damaged iPhone?
If you have a backup, you can extract photos directly from iCloud/iTunes backup. Without a backup, use iPhone data recovery to scan the device — even if the phone can’t be turned on, the tool may detect and recover stored photos.
Can a water-damaged iPhone be repaired? How much does it cost?
Most water-damaged iPhones can be repaired professionally, and the data recovery success rate is high. The repair cost depends on the degree of damage and the model (e.g., iPhone 16 series). It is recommended to consult an Apple-authorized service provider for an accurate quote.
iPhone water damage is not terrible — the key is to take emergency handling and data recovery in a timely manner. If you have iCloud or iTunes backup, you can recover directly through official channels. If there is no backup, the device cannot be turned on, or you are worried about overwriting existing data after recovery, iPhone data recovery is the most reliable choice. Finally, remind everyone to strictly follow the water damage handling guidelines before data recovery to avoid worsening hardware damage. We hope this guide helps you retrieve important data smoothly!

Copyright © 2025 DatasRecovery All rights reserved.

