By Data RecoveryUpdated on March 23, 2026
When your iPhone won’t turn on, it’s not an insurmountable problem to transfer important data such as contacts, music and photos from the device to a new iPhone. Before confirming that the device is completely damaged, we can first try to fix the fault through a variety of practical methods to restore the phone to normal use. Later, with the help of FoneTrans, a professional iOS data transfer tool, we can smoothly migrate all kinds of data from the faulty iPhone to the new iPhone, and the whole operation process is simple and easy to operate.
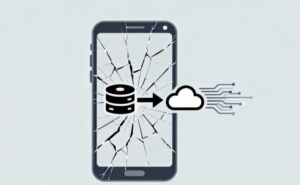
As a professional iPhone sync tool, FoneTrans is an excellent choice for iOS device data management. It can not only realize seamless data transfer between different iOS devices, but also support migrating iPhone data to Mac or iTunes, and synchronize all kinds of data stored in Mac to iPhone devices at the same time. Its core functions cover multi-dimensional data transfer needs, including:
1、Quickly transfer local files such as videos, music and pictures between iPad and computer without tedious operations;
2、Directly synchronize photos, music, playlists and other content in iPhone, iPad and iPod to iTunes to realize data backup and integration;
3、Export core data such as contacts, calendars and photos in iPhone to Windows PC or Mac for data retention;
4、Precisely transfer all kinds of data stored in the computer to iOS devices such as iPhone, iPad and iPod;
5、Fully compatible with all Apple devices equipped with iOS system, including various models of iPhone, iPad Pro/Air/mini and iPod touch, with extremely strong adaptability.
Three Common Reasons Why an iPhone Won’t Turn On
1、The device’s battery is completely dead, which is the most common trigger;
2、The iOS system crashes unexpectedly and can be restored by simply restarting;
3、In a very small number of special cases, the device firmware is damaged and requires professional repair.
Practical Solutions to Fix a Non-Booting iPhone
Method 1: Fully Charge the iPhone
A dead battery is the most common reason for an iPhone not turning on. Although this is easy to overlook, it is the first step in troubleshooting. Unless you can clearly confirm that the device’s battery still has sufficient power, please connect the non-booting iPhone to a wall charger for at least 15 minutes of charging, or you can choose to charge it by connecting to a computer.
It should be noted that some USB ports on the computer keyboard have insufficient power supply and cannot charge the iPhone normally. It is recommended to connect the data cable directly to the USB port of the computer host. If you confirm that the device is out of power but still cannot turn on after charging, it is highly probable that the charger or data cable is faulty, or the charging port is blocked by debris. At this time, check whether there are debris such as cotton wool and dust in the data cable and the phone’s charging port. Such foreign objects will seriously affect the charging efficiency; you can also replace another set of intact chargers and data cables and try charging again.
Method 2: Force Restart by Holding the Power Button + Home Button
If the device still cannot turn on after charging, you can try to fix the system crash by force restarting: press and hold the iPhone’s power button (also called the on/off/sleep button) and home button at the same time for at least 10 seconds. Usually, the Apple logo will appear on the screen within 10-20 seconds. Release both buttons after the logo appears and wait for about one minute, and the device will complete the startup process.
Occasionally, pressing and holding both buttons is still ineffective. You can toggle the device’s mute switch several times before trying this method and then perform the operation. Although there is no clear principle to explain the auxiliary effect of this operation, in actual use, this small skill can sometimes effectively solve the problem of ineffective force restart.
Method 3: Factory Reset to Fix Firmware/System Faults
If the iPhone still has no response after the above two methods, a factory reset will be the best choice to solve most system and firmware faults. It should be noted that this operation will erase all data and settings in the device, so data backup is a prerequisite.
Important Note: If you have not backed up the iPhone files before, please first export and save the important content in the device according to the steps of “Transfer Data from a Faulty iPhone to a New iPhone” below, and then perform the factory reset operation to avoid data loss.
After completing the data export, you can sync the iPhone with iTunes and click the “Restore” button in iTunes to complete the operation; if the device is still in a non-booting state, you can enter the recovery mode through the following steps:
1、Connect one end of the iPhone’s USB data cable to the phone’s charging port, and do not connect the other end to the computer for the time being;
2、Press and hold the iPhone’s home button and keep pressing it without releasing;
3、Connect the other end of the data cable to the USB port of the computer host;
4、At this time, the computer will automatically open iTunes, and the iPhone will successfully enter the recovery mode. With the help of this mode, you can perform a complete factory reset operation on the device.
Steps to Transfer Data from a Non-Booting Faulty iPhone to a New iPhone
After purchasing a new iPhone, if the old iPhone needs to migrate data due to failure to turn on, first try to fix the fault through the above methods, and the core priority task is to export the important files from the faulty iPhone before performing the subsequent iPhone data transfer. The specific operation steps are as follows:
1、Download, install and launch the FoneTrans software on a computer (both Windows and Mac are available);


2、Connect both the old and new iPhones to the same computer with the original data cable;

3、If FoneTrans can successfully recognize both devices, you can directly transfer all kinds of data such as photos, videos, music, call logs, contacts and text messages from the faulty iPhone to the new iPhone with one click through this tool. The whole process requires no complicated operations, and the data transfer is efficient and safe.