By Data RecoveryUpdated on January 10, 2026
In daily life, you may need to create seamlessly connected mix tapes or integrate multiple scattered audio clips into a complete file—whether for music creation, work material organization, or daily entertainment, audio merging is a high-frequency need. In fact, audio merging doesn’t require complex operations; the stability and efficiency of desktop software, along with the convenience and flexibility of online tools, can always meet your needs in different scenarios. This article breaks down 3 practical merging solutions, from professional tools to zero-threshold online platforms, helping you quickly master audio merging skills.
Video Converter Ultimate is an all-in-one audio and video tool compatible with Windows and Mac systems. It not only can merge audio with one click but also supports format conversion, clip editing, and other functions, making it especially suitable for users pursuing lossless quality and efficient operations. Whether it’s common formats like MP3 and AAC, or lossless formats like FLAC and OGG, it can be easily compatible. The merging process does not damage the sound quality, and you can customize output parameters.
Core Highlights
1.Supports 1000+ audio/video formats, covering mainstream and niche format needs
2.Fast merging speed, improved efficiency with hardware acceleration technology
3.Built-in editing functions such as trimming, fade in/out, and splitting, no need for additional tools
4.Customizable encoder, sample rate, bit rate and other parameters to meet personalized needs
5.Output files do not overwrite original files, safe and risk-free
Operation Steps:
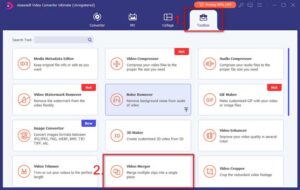
Step 1 :After downloading and installing, launch the software, click the top “Toolbox” tab, and find the “Video Merger” function (supports both audio and video merging).


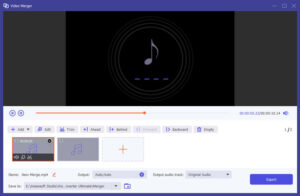
Step 2 :Click the “+” icon on the interface to upload all audio clips to be merged. After uploading, you can view the file list in the preview area at the bottom.
Step 3 :Adjust the order of clips: directly drag the clips to the target position, or use the “Move Up” and “Move Down” buttons for precise sorting.
Step 4 :Customize output settings: click the “Output” button, select “Audio Export”, and set the format (e.g., MP3), encoder, sample rate (44100Hz is recommended), bit rate (320kbps is preferred) and audio channel as needed. Click “OK” after setting.
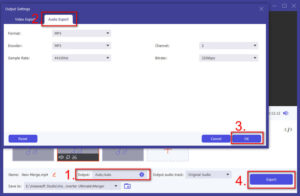
Step 5 :Select the save path and click “Export” to start merging. After merging, you can further optimize the audio quality directly in the software without worrying about losing the original files.
As a professional audio and video editing software, Adobe Premiere Pro achieves precise audio merging with its “Nesting Function”, making it suitable for users who need to process audio and video materials synchronously or pursue professional editing effects. However, its operation is relatively complex, more suitable for users with basic skills.
Operation Steps:
Step 1 :Open Premiere Pro, drag the audio clips to be merged into the same audio track, ensuring no overlap between the clips.
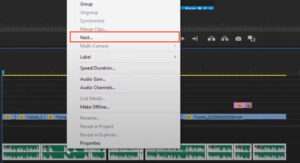
Step 2 :Select all the clips to be merged, right-click to pop up the menu, and select the “Nest…” option.
Step 3 :Name the merged audio, click “OK”; right-click the nested clip again and select “Render and Replace”.
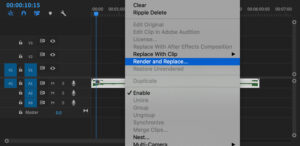
Step 4 :After completion, multiple audio clips will be integrated into a single file. Note: This operation will directly replace the original clips, and subsequent splitting and editing are not possible. It is recommended to confirm that all clips have been edited in place before merging.
If you don’t want to download software, online audio merging tools are the best choice—Clideo Audio Joiner is free and easy to use, supporting 16 audio formats. It can quickly complete merging without installation, making it suitable for processing short audio clips or temporary needs.
Operation Steps:
Step 1 :Open the official website of Clideo Audio Joiner, click “Choose files” to upload the audio clips to be merged (can be imported from local, cloud or URL).
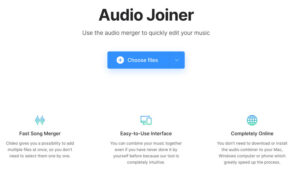
Step 2 :After uploading, adjust the playback order by dragging the clips; select the appropriate output format (e.g., MP3, WAV) at the bottom of the page.
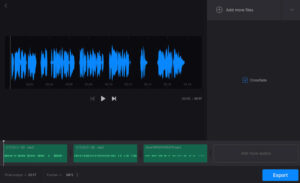
Step 3 :To optimize the transition effect, check the “Crossfade” option on the right to make the connection between clips more natural.
Step 4 :Click “Export” and wait for the merging to complete (the page will display a “Done!” prompt), then download the merged audio file.

Copyright © 2025 DatasRecovery All rights reserved.
 iPhone Data Recovery
  iPhone Unlocker
  Android Data Recovery
  Broken Android Data Extraction
  Android Unlocker
  Data Recovery (Windows/Mac)